• Home
  • OUR STORY
    • OUR STORY
    • The Classic Railing Difference
    • Manufacturing
    • CONTACT US
  • PRODUCTS
    • PRODUCTS
    • Picket System
    • Glass System
    • LED Lighting
  • PLANNING
  • RESOURCES
    • RESOURCES
    • Installation Instructions
    • The Green Choice
    • Maintenance and Care
    • Warranty
    • FAQ
    • Download Center
  • CERTIFIED INSTALLER
  • CONTACT US
Twitter

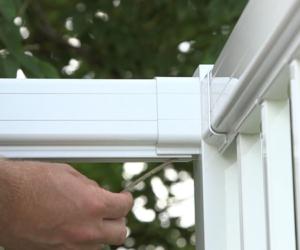
Install the weather proof transformer inside the post that is closest to your power supply. First, take a rubber mallet, and remove the post cap from the post. The post has a hole in the bottom of the post base plate for the cord to pass through.

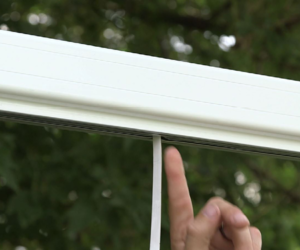
Ensure you drill a 1-1/4″ hold through the decking for the cord to pass through.

Next you are going to want to connect your radio frequency (RF) receiver to the weather proof transformer.

When connecting the radio frequency (RF) receiver to the transformer, make sure you line up the pins and inner notch correctly. Tighten the screw grommet onto the transformer so no water or moisture can enter.

Lower the weather proof transformer inside the post, feed the cord down through the bottom post base hole and through your decking hole you made in the previous step.

Tuck the radio frequency (RF) receiver into the post. Take some double sided tape and mount it approx 2″ down from the top (on the inside of post).

Take the LED strip and feed it through the provided hole in the Regal post.

Connect the LED strip to the radio frequency RF receiver. Connect the top side of the RF receiver to the “LED light” side of the LED strip. Listen/fell for the “click”, which indicated the LED connection is locked together.

IMPORTANT: If you need to unlock an LED connection, unlock the small tabs on the sides of the LED strips and gently disconnect. DO NOT try pulling apart without unlocking or you will damage the pin connections.

Before continuing to the next step, plug in the power cord of the transformer and turn use the remote to turn on the LED system. TIP: Test each LED light strip as you install the lighting system.

To install the LED strips, start by pulling a few feet of LED through the post.

Remove the first few feet of protective backing exposing the adhesive. Leave approx 1″-2″ of extra LED light strip in the inside of the post, to allow for any movement. Failure to do this may result in lights disconnecting and getting damaged. Tape the 1″-2″ LED slack to the inside of the post to act as an anchor.

Take your radio frequency (RF) receiver antenna and feed it through the same hole the LED passes through.

Expose the antenna 1″-2″. This ensures you get good reception on your remote.

IMPORTANT: DO NOT adhere the LED strip to the aluminum top rail. The glass vinyl insert must be installed first (model:LED-G).

Before installing the LED into the top rails, you will need to the LED-G vinyl glass insert.

IMPORTANT: Ensure you are using model LED-G vinyl glass insert, NOT GVIL glass insert.

Measure in between the posts and cut the LED-G vinyl glass insert accordingly.

IMPORTANT: There are two pieces to the LED-G, one for the top rail and one for the bottom rail. Install the piece with the clear vinyl glass gasket to the top rail. The sold black gasket goes in the bottom rail.

With the LED-G vinyl glass inserts in place, remove protective backing from LED strip and adhere LED strip inside the LED-G vinyl glass insert, with the LED lights pointing down.

When passing the LED strip through a post, always remove the post cap to give you access to the LED strip to help guide it though the next opening.

When you reach the last post and there is extra LED remaining, tuck the remaining LED strip down inside the post. DO NOT CUT the LED strips.

Place a rubber block in each end of bottom rail gasket 3” in from each edge of where glass panel will rest.

Install glass by first sliding the glass up into the top rail and then down into the bottom rail, resting on top of the rubber blocks.

Turn your LED lighting system on using the remote and enjoy your deck day and night.

Regal ideas energy efficient LED lighting system will make your outdoor living space come alive!

© Classic Aluminum Railing – The number one aluminum railing system in North America – Copyright © 2020.  All rights reserved.