• Home
  • OUR STORY
    • OUR STORY
    • The Classic Railing Difference
    • Manufacturing
    • CONTACT US
  • PRODUCTS
    • PRODUCTS
    • Picket System
    • Glass System
    • LED Lighting
  • PLANNING
  • RESOURCES
    • RESOURCES
    • Installation Instructions
    • The Green Choice
    • Maintenance and Care
    • Warranty
    • FAQ
    • Download Center
  • CERTIFIED INSTALLER
  • CONTACT US
Twitter
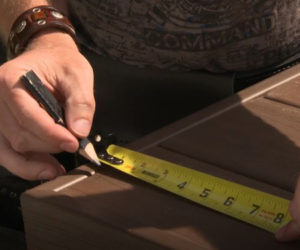
IMPORTANT NOTE:   Before you begin, its important to plan your railing and determine the location of each post, or wall mounted post brackets, locate any stairs, LED options, and importantly check with your local Building Department for guidelines and limitations before you begin any deck/railing project.

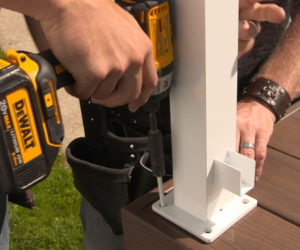
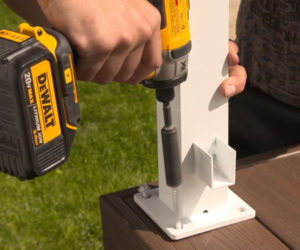
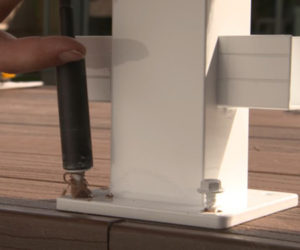
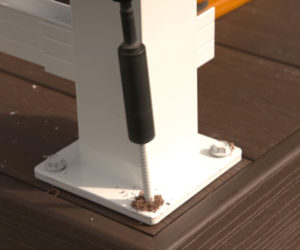
Our post bases plates are powder coated, top and bottom, which makes them ACQ corrosion resistant. No need to buy or worry about extra gaskets or products failing and corroding over time.

Identify where you will be placing your posts. Mark out from the edge of the deck 1″-2″. This mark is where you will place the edge of your post base.

With proper under-blocking installed fasten your post in place with only 1 to 2 fasteners. It is important you check with your local Building Department for approved fastener sizes for the deck you are building.

TIP: At this stage, DO NOT fasten your fasteners all the way into your base. You want to have a bit of play (movement) in the post to allow for installation of your Top and Bottom rails in Step 2.

Repeat these steps for your remaining posts. Post spacing should not exceed 6ft for glass and 8ft for picket railing.

To install rails, measure the distance between the posts at the base of the post. Deduct 1/2” from this measurement and cut rails.

Slide top rail into welded post bracket.

Slide bottom rail into bottom welded post bracket.

Using a level, plumb all posts.

While leveling posts, install remaining fasteners into post base to tightly secure.

Once post bases are tightly secured, double check that post is plumb with a level and attach top rails to welded post brackets with CS-50 #10×3/4″ screws.

Pre-drill the bottom rails using a 1/8″ (3mm) drill bit and fasten bottom rails to posts using a color matching Regal ideas screw (CS-50)

IMPORTANT: Adjust/lower the torque on your driver when fastening into aluminum. Too much torque will make the screw hole larger and may break screw heads.

Drill 3/16” diameter weep holes in bottom rail every 16″ – 24” to allow any water/moisture to escape during the various seasons.

When completed, go back and inspect that each top and bottom rail has a screw fastened to it.

The key to the system are the patented “locking” pickets. Each picket must be installed with the grooves parallel to the top and bottom rails in order for pickets to interlock with rails

Important to note that pickets are grooved on two sides of each end of the picket. The pickets lock the top and bottom rails together. This eliminates the need of a bottom rail support and no need for screws in the pickets.

If you have not had to cut your top and bottom rails, then you can start assembling your pickets starting from one side. If you have cut your top and bottom rails, then start from the center and move outward towards the posts symmetrically.

Start locking your picket into the bottom rail first and then snap into the top rail. You will know when it locks into place when you hear/feel the “click”.

It’s important that when you get to the end of a section to put in the last three pickets together, it will make it a lot easier to put the spacers in.

As you are installing the pickets, you will want to install the aluminum spacers. Snap the aluminum spacer in the bottom and tap the picket snug next to it with a rubber mallet.

Snap in the top spacer and tap the picket snug next to it using a rubber mallet. Spread pickets and snap on remaining spacers. Cut last spacers to fit.

There you have it, Classic Aluminum Picket installation as easy as 1-2-3!

Add a finishing touch to your railing system, by installing the color matching aluminum post base caps. These hide and protect your post anchors and give your project that professional finished look.

© Classic Aluminum Railing – The number one aluminum railing system in North America – Copyright © 2020.  All rights reserved.